Posts mit dem Label english werden angezeigt. Alle Posts anzeigen

Samstag, 12. April 2025

Double-sided printing on Brother MFC-L2710DW now working again on Ubuntu

I'm using a Brother MFC L2710DW with my Ubuntu machines. 

I've chosen this printer (which supports duplex printing) years ago because it was supported by Ubuntu out of the box.

However, after updating to Ubuntu 24.04 (Noble Numbat) the duplex printing capability was gone...  The "front" page was printed OK, but the "back" page looked like a memory dump: parts of the intended output were visible but interleaved with random and geometric pixel patterns.

It turned out that the printer driver für the MFC-L2710DW had changed to "brlaser" between Ubuntu versions.  This driver is now responsible for various brother laser printers.

I opened a bug report on the brlaser Github repo.  It turned out that this was a know problem that had meanwhile been fixed.

However - the fix hadn't made it into the branch that Ubuntu is using.
I created a bug report in Launchpad with a link to the GitHub-Thread.
The maintainer promptly created a new version which has now (mid-April 2025) "pre-release" status.

If you can't wait: the binaries are available if you follow the links on Launchpad.
After downloading and installing it (sudo dpkg -i printer-driver-brlaser_6.2.7-0ubuntu1_amd64.deb) double-sided printing is again working.

Sonntag, 23. März 2025

openpyxl - data_only beware

openpyxl is a popular library to access Excel data via python.

However, there is an unexpected side effect if you have formulas in your Excel workbook.
I'm not the first to find that out the hard way - so here is another warning.

If you have a formula in your xlsx-spreadsheet like "=B1-A1" the spreadsheet app (Excel, LibreOffice etc.) stores the formula as well as the calculated result which you can see in the cell.

If the formula is stored e.g. in "C1", and you open the file in your python script like this:

    import openpyxl

    wb = openpyxl.load_workbook(filename="testwb.xlsx")
    print(sheet["C1"].value)
    # prints the formula

The result will be the formula, not the calculated value.

In order to access the calculated value, you have to open it with data_only set to True.

    import openpyxl

    wb = openpyxl.load_workbook(filename="testwb.xlsx", data_only=True)
    print(sheet["C1"].value)
    # prints the calculated value


The catch is that if you try to save the workbook later with for example

    wb.save("testwb2.xlsx")

all formulas in the entire workbook are gone (if the workbook was loaded with data_only=True).

If you must have access to the results of the formulas that Excel has calculated, the work-around is to open two instances of the workbook: one with and one without data_only.
Make the one using data only also read_only, just in case

    wb = openpyxl.load_workbook(filename="testwb.xlsx", data_only=False)
    wb_dataonly = openpyxl.load_workbook(filename="testwb.xlsx", data_only=True, read_only=True)

This way you have access to the calculated values via wb_dataonly and you can add data and save the result using wb... and yes, you have to keep in mind that the two instances go out of sync as soon as you modify wb.


Donnerstag, 13. März 2025

Bitwarden's ssh-agent


The most secure way of accessing external ssh servers is the use of ssh-keys and I'm deploying them regularly. The private key is stored on my hard drive, and I'm protecting it with a passphrase. Remembering the passphrase especially for a site you rarely use has always been a PITA.

Since the beginning of this year (2025) the password manager Bitwarden allows you to manage your ssh-keys as well. So I gave it a try.

Under Ubuntu you have to install the Bitwarden desktop app from the snap repo and connect it to your vault. After setting SSH_AUTH_SOCK in your .bashrc the desktop app acts as your ssh-agent:

export SSH_AUTH_SOCK=/home/your_user_name/snap/bitwarden/current/.bitwarden-ssh-agent.sock

While importing keys I've noticed that Bitwarden only likes the "new ones" (that use Ed25519 elliptic curve crypto).  It was a good opportunity to re-key.

Bitwarden itself always generates Ed25519 keys.  The reason might be that this special kind of key allows you to calculate the public key from the private one.

When importing keys into Bitwarden I had to provide the passphrase to my keys, which made me hesitate - perhaps a Gibson-ian reaction :) - because it meant that the key is stored "naked" in the Bitwarden vault.
I would have liked it more if Bitwarden would have provided the passphrase on request - but this would have made integration as ssh-agent impossible.

How is the risk mitigated?

  • You are prompted each time a ssh-key is requested from the vault, which is an improvement over the regular ssh-agent.
  • There is no indication where a key can be used, if you don't put it into the comment.
  • Up until now Bitwarden has a spotless record of securing your vault.


Integration with .ssh/config

The .ssh/config file allows you to configure additional items like hostname, user name, port, the ssh-key AKA the identity file, and port forwarding rules for a given host.  This way you don't have to specify them every time in a ssh command.  If and only if an identity file is configured for a given host a ssh-agent will be queried.

If you generate the ssh-key within Bitwarden the private key is stored in your vault.  But what do you put into the IdentityFile field to make the system query the Bitwarden app?

As Kiko Piris pointed out here, it needn’t be the private key that is stored on the hard drive.  It might also be the public key.  This will not help you if the Bitwarden app is not running, but at least it will make ssh try to contact the ssh-agent.

You might have noticed during the regular use of the Bitwarden app that the IdentityFile field has to be present in the .ssh/config file but the key file itself is not used.
I still have my passphrase-protected private keys on my hard drive with the IdentityFile field pointing to them.  But when I log in with ssh I’m not queried for the passphrase, instead the Bitwarden Desktop app pops up requesting confirmation to use the key it has stored in its vault.

The Bitwarden app has a button that copies the public key into the clipboard which can be used to create the public key file which then can be specified in the IdentityFile field.

It is - as usual - a compromise between security and convenience.  If it fits your risk profile it's a nice tool.

Montag, 3. März 2025

matplotlib - The secret of the vanishing x-ticks

The versions:
* Ubuntu 24.04
* python 3.12.3
* matplotlib 3.10.0

I've searched for this solution for days. So I describe it here for anyone who might need ist.

The goal is rather simple:

I want to create a figure with three subplots, each with an independent x-axis because I want to display data with different time periods.

I expected to get something like this:

Three separate subplots, each with its own labels on the x-axis showing a grid as well as date and time.

And that is exactly what you get if execute this simple program.

#!/usr/bin/env python3
# -*- coding: utf-8 -*-

import matplotlib.dates as mdates
import matplotlib.pyplot as plt
from datetime import datetime

import matplotlib as mp
print(mp.__version__)
# 3.10.0

FORMAT_MAJOR = False
FORMAT_MINOR = False

# Format definitions
# not all are used

years = mdates.YearLocator()            # every year
months = mdates.MonthLocator()          # every month
days = mdates.DayLocator()              # every day
hours = mdates.HourLocator()            # every hour
years_fmt = mdates.DateFormatter('%Y')
month_fmt = mdates.DateFormatter('%m')
day_fmt = mdates.DateFormatter('%d')
hour_fmt = mdates.DateFormatter('%H')

fig, axs = plt.subplots(nrows=3, ncols=1, figsize=(187, 12), sharex="none")

datx0 = [ datetime(2025, 1, 31), datetime(2025, 2, 2), datetime(2025, 2, 3) ]
daty0 = [100, 200, 150]

datx1 = [ datetime(2025, 2, 4), datetime(2025, 2, 5), datetime(2025, 2, 7) ]
daty1 = [150, 100, 150]

datx2 = [ datetime(2025, 2, 1), datetime(2025, 2, 4), datetime(2025, 2, 5) ]
daty2 = [200, 200, 150]

axs[0].plot(datx0, daty0)
axs[1].plot(datx1, daty1)
axs[2].plot(datx2, daty2)

for pos in range(3):  # 0..2
    curraxs = axs[pos]
    curraxs.grid(True)

    if FORMAT_MAJOR:
        curraxs.xaxis.set_major_locator(days)
        curraxs.xaxis.set_major_formatter(day_fmt)
        curraxs.tick_params(axis="x", which="major", rotation=45)

    if FORMAT_MINOR:
        curraxs.xaxis.set_minor_locator(hours)
        curraxs.xaxis.set_minor_formatter(hour_fmt)
        curraxs.tick_params(axis="x", which="minor", rotation=90)

    # only 1% "slack" at each end
    curraxs.set_xmargin(0.01)

print(axs[0].xaxis.get_majorticklabels())
print(axs[1].xaxis.get_majorticklabels())
print(axs[2].xaxis.get_majorticklabels())

plt.show()


As you can see, there are three data series.

  • The first from 2025-1-31 to 2025-2-3.
  • The second from 2025-2-4 to 2025-2-7.
  • The third from 2025-2-1 to 2025-2-5.

The date ranges have been chosen to overlap slightly.  The y-data has no special meaning other than to show different graphs in the subplots.

The vanishing act occurs if you try to format the x-axis labels.

This is usually done with:


import matplotlib.dates as mdates

days = mdates.DayLocator()
day_fmt = mdates.DateFormatter('%d')

axs.xaxis.set_major_locator(days)
axs.xaxis.set_major_formatter(day_fmt)


This works fine for a single axis.  If you have more than one, strange things happen:

That’s the output with the variable FORMAT_MAJOR set to True.

The missing x-ticks become more apparent if you set FORMAT_MINOR to True as well.


  • In the first subplot the ticks for 2025-01-31 are missing.
  • In the second subplot the ticks from 2025-02-05 and above are missing.
  • Only the third subplot has all x-ticks.

The output of the get_majorticklabels() of the three axis at the end of the program...

print(axs[0].xaxis.get_majorticklabels())
print(axs[1].xaxis.get_majorticklabels())
print(axs[2].xaxis.get_majorticklabels())

...gives an indication of what happened:

They are all identical – using the values from the last call 2025-01-01 to 2025-02-05.
Which explains the missing parts at the beginning of the first subplot and the missing days at the end of the second.

So, how to fix this?

It seems that – contrary to what one might believe – the xxxxLocator() calls are not simply generators that produce ticks as requested.  They seem to keep some kind of internal state – in this case of the last subplot – influencing all the other uses.

You have to move them into the for-loop so that for each axis a “new” xxxxLocator() is created.

...

for pos in range(3):  # 0..2
    curraxs = axs[pos]
    curraxs.grid(True)

    days = mdates.DayLocator()
    hours = mdates.HourLocator()


    if FORMAT_MAJOR:
        curraxs.xaxis.set_major_locator(days)
        curraxs.xaxis.set_major_formatter(day_fmt)
        curraxs.tick_params(axis="x", which="major", rotation=45)
        
    ...


This gives the expected result:


Sonntag, 9. Januar 2022

Docker: temporary error ... try again later

In case you encounter this error message while creating docker images I want to draw your attention to a more unusual reason (DNS), how to fix it, and the somewhat embarrassing root cause in my case.

Have fun.


When setting up a docker installation on an Ubuntu Server 20.04 LTS system the build process for a docker image that had worked fine on my desktop computer failed with this misleading error message:

fetch http://dl-cdn.alpinelinux.org/alpine/v3.4/main/x86_64/APKINDEX.tar.gz
ERROR: http://dl-cdn.alpinelinux.org/alpine/v3.4/main: temporary error (try again later)


Strangely enough I could wget this file from the command line.

If you google this error the standard advice is to update docker. I did (to version 20.10.12) ... but it didn't help though.

With problems like this it's always good advise to try to replicate it with the most simple setup possible.

In this case:

  • Get a small Linux system image from the repo (alpine)
  • and start a command line inside the container: sh
  • try to install a package (curl) within the container


$ docker run -it alpine:3.4 sh

/ # apk --update add curl
fetch http://dl-cdn.alpinelinux.org/alpine/v3.4/main/x86_64/APKINDEX.tar.gz
ERROR: http://dl-cdn.alpinelinux.org/alpine/v3.4/main: temporary error (try again later)
WARNING: Ignoring APKINDEX.167438ca.tar.gz: No such file or directory
fetch http://dl-cdn.alpinelinux.org/alpine/v3.4/community/x86_64/APKINDEX.tar.gz
ERROR: http://dl-cdn.alpinelinux.org/alpine/v3.4/community: temporary error (try again later)
WARNING: Ignoring APKINDEX.a2e6dac0.tar.gz: No such file or directory
ERROR: unsatisfiable constraints:
  curl (missing):
    required by: world[curl]


Docker did download the alpine image but inside the container downloading the APKINDEX failed. And yeah - I did wait and tried again later... no luck.

Back inside the container I tried:

/ # ping 8.8.8.8
PING 8.8.8.8 (8.8.8.8): 56 data bytes
64 bytes from 8.8.8.8: seq=0 ttl=117 time=14.639 ms
64 bytes from 8.8.8.8: seq=1 ttl=117 time=13.921 ms
64 bytes from 8.8.8.8: seq=2 ttl=117 time=13.956 ms
^C

/ # ping google.com
ping: bad address 'google.com'


Which means: I can reach the internet from inside the container but the DNS resolution obviously isn't working. Let's see who is resolving:

/ # cat /etc/resolv.conf
# This file is managed by man:systemd-resolved(8). Do not edit.
#
# This is a dynamic resolv.conf file for connecting local clients directly to
# all known uplink DNS servers. This file lists all configured search domains.
#
# Third party programs must not access this file directly, but only through the
# symlink at /etc/resolv.conf. To manage man:resolv.conf(5) in a different way,
# replace this symlink by a static file or a different symlink.
#
# See man:systemd-resolved.service(8) for details about the supported modes of
# operation for /etc/resolv.conf.

nameserver 129.168.0.1
search local


Who is 129.168.0.1 and how did it became the nameserver? To be honest - it was my fault (more on that later).

Using the only text editor available in a base alpine install I changed it to

/ # vi /etc/resolv.conf
nameserver 8.8.8.8


And yes, when using vi I always have to think very hard how to get the changes written back to disk.

Trying to add the package now works like a charm:

/ # apk --update add curl
fetch http://dl-cdn.alpinelinux.org/alpine/v3.4/main/x86_64/APKINDEX.tar.gz
fetch http://dl-cdn.alpinelinux.org/alpine/v3.4/community/x86_64/APKINDEX.tar.gz
(1/4) Installing ca-certificates (20161130-r0)
(2/4) Installing libssh2 (1.7.0-r0)
(3/4) Installing libcurl (7.60.0-r1)
(4/4) Installing curl (7.60.0-r1)
Executing busybox-1.24.2-r14.trigger
Executing ca-certificates


So the problem is definitely a faulty DNS name server .... How can this be fixed?

If I start the container with the --dns option ...

docker run --dns 8.8.8.8 -it alpine:3.4 sh

apk add runs without a problem. And if I check /etc/resolv.conf it says 8.8.8.8

Slight problem: --dns works with docker run but not with docker build.

You have to tell docker itself to use a different DNS server.

Googles first advise is modifying /etc/default/docker like this

DOCKER_OPTS="--dns=my-private-dns-server-ip --dns=8.8.8.8"

But Ubuntu 20.04 LTS uses systemd and in this case these settings are ignored.
You have to create an override files for this systemd service using

sudo systemctl edit docker.service

with the following content

[Service]
ExecStart=
ExecStart=/usr/bin/dockerd --dns 8.8.8.8 -H fd:// --containerd=/run/containerd/containerd.sock

I first located the original docker.service file, copied the ExecStart line, and added the dns option.
The first empty ExecStart is needed to clear its original value before setting the new one... good to know (thanks - herbert.cc).

Everything worked.


So - who is 129.168.0.1? Well, it's a typo. It should read 192.168.0.1 - my cable modem.

I later found it in /etc/netplan/00-installer-config.yaml which sets up the machine's IP address, gateway, DNS resolver, etc.
I must have made this typo while installing the system onto the hard drive using the Ubuntu installer.

But why did the internet connection work at all? I could download files... the docker image for example.

My specific setup made the system use a fixed IP address (as servers usually need one) but it did NOT disable DHCP.

So eventually the DHCP server updated the faulty DNS resolver setting with the correct value and all worked fine.

It seems that docker samples the DNS nameserver during boot-up at a time after the yml-file had set the wrong value and before the DHCP server could replace it with the correct one.  It then hands this value to the docker build and docker run processes instead of the nameserver currently in use. As those values are usually identical nobody does notice.

I don't know if I would call this a bug but it is unexpected behaviour.

Now you know.


Useful links

  • https://serverfault.com/questions/612075/how-to-configure-custom-dns-server-with-docker
  • https://serverfault.com/questions/1020732/docker-settings-in-ubuntu-20-04
  • https://docs.docker.com/config/daemon/systemd/
  • https://www.herbert.cc/blog/systemctl-docker-settings/


Donnerstag, 23. Oktober 2014

Accessing library materials, groups and other stuff via the Blender Python API

Information valid for Blender 2.72

The API documentation for the equivalent of the Link and Append command is a bit cryptic regarding what values to use for the parameters of this operator.  After some Googleing I found the solution in a few snippets of code here.

The main parameters of the Blender Python append command are:
  • filepath
  • filename
  • directory

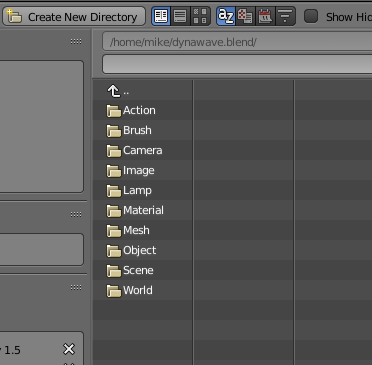
The values of these parameters combine the file system path of the blend file and its "inner" structure.

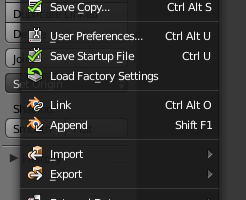
You can see this structure if you use the Link/Append command of the Blender GUI.  Once you click on the blend file its inner structure with materials, groups, objects etc. becomes visible.


In order to append for example the Material with the name white55 from a file named test.blend located in my home directory /home/mike, I have to use:

bpy.ops.wm.append(
   # // + name of blend file + \\Material\\
   filepath="//test.blend\\Material\\",

   # name of the material
   filename="white55",

   # file path of the blend file + name of the blend file + \\Material\\
   directory="/home/mike/test.blend\\Material\\", 
  
   # append, don't link
   link = False
)


Check the API entry for the other parameters.

This is an example from a Unix system, where the file path separator is a normal slash; on Windows systems you have to use a backslash.

However, the backslash is also the Python escape character, i.e. for one \ in the path name, you have to type \\

You can modify this example using \\Object\\ or \\Group\\ ...

Note: The operator append has recently (v2.71) been renamed.  It's earlier name was link_append.

This operator doesn't return an error code if the material, object etc. couldn't be loaded.  You have to be sure that it is present in the blend file.

You can iterate over the material names in a blend library file using the following snippet:

with bpy.data.libraries.load("/home/mike/test.blend") as (data_from, data_to):
   print(data_from.materials)


data_from.materials is a list of strings with the material names. The list is empty, if there aren't any materials available.

The command dir(data_from) returns
['actions', 'armatures', 'brushes', 'cameras', 'curves', 'fonts', 'grease_pencil', 'groups', 'images', 'ipos', 'lamps', 'lattices', 'linestyles', 'masks', 'materials', 'meshes', 'metaballs', 'movieclips', 'node_groups', 'objects', 'paint_curves', 'palettes', 'scenes', 'sounds', 'speakers', 'texts', 'textures', 'worlds']

Three guesses what data_from.groups or data_from.textures will return and how to modify the append command...

Sonntag, 14. September 2014

Blender: Change Cycles render seed automatically

Here is a small Blender add-on to change the seed value for the Cycles render engine automatically before rendering a frame.

The seed value determines the noise pattern of a cycles render.

If you only render one image, this is of no concern for you.

If you render an animation, you get the same pattern for each frame which is very obvious for the viewer.

To counter this, you can enter #frame as seed value (creating a so called driver) which returns the frame number as seed value. This gives you a different noise pattern per frame which makes it look like film grain.

This obviously only works if you have an animation to render, but not with a single frame.

After installing the add-on you see an additional checkbox in the render samplig panel where you can switch this feature on or off.


Why to go the trouble to write an add-on for this?

Lately I have used image stacking a lot.

This technique allows you to reduce noise in pictures created by Cycles rendering engine by rendering the same frame multiple times - provided you change the render seed. You then can calculate the "average" of these pictures (e.g. using ImageMagick) cancelling out some noise.

If you want to a clearer version of an image that has just rendered over an hour, you save it and render it again, then stack the images. This is much faster than scrapping the first image and re-rendering it with a larger sample count.

After forgetting to change the seed value a couple of times, the level of suffering was high enough to make an add-on. :-)


Dienstag, 9. September 2014

How to "average" PNG files with ImageMagick

In a recent post on CgCookie Kent Trammell explained that you can improve the quality of a Cycles render by rendering the image multiple times if you use a different value for the sampling seed.


In his case those images were calculated by different computers of his render farm.

But the same is true, if you waited for an hour for a render to finish, and you are pleased with the image except for the noise.  In this case save the image, change the seed value and render it again.  This way the first hour was not in vain.

In any case you will end up with one or more PNG files with look similar except for the noise pattern which changes with the seed value.

If you calculate the mean image of these images the noise level will be reduced.

Kent Trammell showed how this calculation can be achieved with the Blender node editor (his math was a bit off, but the principle is sound).

The same could be accomplished with other programs like Photoshop or The Gimp or command line tools like ImageMagick.

The ImageMagick command for doing this is:

convert image1 image2 image3 -evaluate-sequence mean result

However, if you try this with PNG files that contain an alpha channel (RGBA) the result is a totally transparent image. 

In this case use the option "-alpha off", e.g. like this:

convert render*.png -alpha off -evaluate-sequence mean result.png

A final note: Keep in mind that all images will be loaded into memory during this process - i.e. you want to limit the number of images.

Sonntag, 17. Februar 2013

How to store images in mp3 files using eyeD3


(This post refers to version 0.7.1 of eyeD3)

eyeD3 is a powerful python utility for manipulating id3 tags from the command line, but it also exposes these function as a python module.

Unfortunately the documentation on the site on how to use it as a python module is sparse, although it covers most use cases:

import eyed3

audiofile = eyed3.load("song.mp3")
audiofile.tag.artist = u"Nobunny"
audiofile.tag.album = u"Love Visions"
audiofile.tag.title = u"I Am a Girlfriend"
audiofile.tag.track_num = 4

audiofile.tag.save()

Information on how to access images are not readily available. But being open source, you can look at the source code to find out:

Example on how to append an image

import eyed3

# load tags
audiofile = eyed3.load("song.mp3")

# read image into memory
imagedata = open("test.jpg","rb").read()

# append image to tags
audiofile.tag.images.set(3,imagedata,"image/jpeg",u"you can put a description here")

# write it back
audiofile.tag.save()

The constant 3 means Front Cover, 4 means Back Cover, 0 for other.
The complete list can found at eyed3/id3/frames.py

"image/jpeg" is the mime type.
u"...” is a description, which must be provided in a unicode string. EasyTAG e.g. stores the original file name in this field.


Example on how to access the images

import eyed3

# load tags
audiofile = eyed3.load("song.mp3")

# iterate over the images
for imageinfo in audiofile.tag.images:
   ...

Amoung the infos available via imageinfo are:
 .image_data - image binary data
 .mime_type  - e.g. “image/jpeg”
 .picture_type - 3, 4, 0, see above
 .description - the description field

You can access the imageinfo also like this:

audiofile.tag.images[x]

Where x is the index into an array starting with 0. Eventually you will get an out of range exception.


Donnerstag, 17. Mai 2012

AVCHD and avidemux


Many current camcorders store video according to the AVCHD specification. This is a MPEG2 transport stream with video encoded in H.264 and audio in Dolby AC-3 format.

avidemux which usually is my Swiss army knife for video conversion could not handle the .MTS files produced by the camcorder - at least not the version which are currently available in the Ubuntu repositories (avidemux 2.5.x).

After visiting the avidemux homepage I was pleased to find out, that version 2.6 can handle that format.

This post describes how to compile avidemux 2.6. It mostly reflects the process laid out in the avidemux wiki with some additional information to avoid some pitfalls.

I tested it on vanilla installs of Ubuntu Natty and Precise and the compilation works like a charm. Please keep in mind that you compile from nightly builds and not all functions are implemented yet (May 2012, git revision 7949).

Requirements:

First we need git to pull the source code:

sudo apt-get install git

For the core application

sudo apt-get install libxml2-dev gcc g++ make cmake pkg-config libpng12-dev fakeroot yasm

For the GUI (QT4)


sudo apt-get install libqt4-dev

For the common plugins

sudo apt-get install libaften-dev libmp3lame-dev libx264-dev  libfaad-dev libfaac-dev

For the PulseAudio plugin

sudo apt-get install libpulse-dev

Download the source

git clone git://gitorious.org/avidemux2-6/avidemux2-6.git

Compile it

cd avidemux2-6
bash bootStrap.bash --deb

This will produce four .deb files in the ./debs folder.

Install it

cd debs
dpki -i *

Run it

avidemux3_qt4


Configure it

Sometimes you have to select the correct audio device in Edit - Preferences - Audio - AudioDevice:


Links:

avidemux homepage + wiki

Donnerstag, 29. März 2012

Current versions of blender under Ubuntu

The normal way to stay current with your blender version is to download it from 
http://www.graphicall.org/

You can use the following commands to get it using the normal Ubuntu updates via ppa:

sudo add-apt-repository ppa:cheleb/blender-svn
sudo apt-get update
sudo apt-get install blender

How-to abcde from an audio CD image

abcde is a command line CD encoder.  It rips CDs and encodes it in MP3, OGG or other formats.

By default it reads from your CD drive.  If you only have an image of your CD you are out of luck. You can either first burn the image on let abcde work on the CD, or use the only other format abcde currently accepts as input: a flac file with embedded cue sheet.

There are two common images files for audio CDs: cue/bin and toc/bin

The bin file contains the digital representation of the audio, whereas the remaining file describes where the tracks start and end.

cue/bin

You can create the flac file from cue/bin files using the following command:

flac --best --force-raw --sample-rate=44100 --channels=2 --bps=16 --endian=big --sign=signed --cuesheet=image.cue image.bin -o image.flac

Check the compression ratio after flac has finished.  A ratio of approx. 0.99 usually indicates that the byte order is reversed.  This may happen if the image was created on a Mac. If you play back the flac file, you will hear mostly noise. In this case change the byte order to

--endian=little

Normal compression ratios are in the range of 0.6 to 0.7.

You can then convert the flac file to single tagged MP3 files using:

abcde -d image.flac

toc/bin

flac can't process TOC files. You have to convert them into the CUE format. Fortunately there is an app for that: cueconvert from the cuetools package:

cueconvert image.toc image.cue

I had to find out that cueconvert will abort with a syntax error when I used toc files created by Brasero.

In this case load the toc file into a text editor and remove the CD_TEXT { … } block, if present.

And while you're at it, delete all lines containing ISRC codes, as flac does not like these.

After the conversion use the resulting CUE file as described earlier.

Sonntag, 11. Dezember 2011

Replay Gain on Sansa Clip+ with mp3gain

If you play MP3 songs from different sources in shuffle mode on a MP3 player, their difference in loudness become apparent and you are constantly keep adjusting the volume.

In order to prevent that, Replay Gain can be used. With this function the MP3 player uses loudness information in the header of a MP3 file to adjust the volume automatically.

However, the loudness information is not present by default. You need software to analyse the content and store those values in the MP3 header. Replay Gain does not change the underlying (music) data, thus avoiding loss in quality by decoding, processing and re-encoding.

A popular utility in the Linux world to calculate these values and tagging the file is mp3gain.

I used it regularly, but I was still adjusting the volume on my Sansa Clip+ ...

What I didn't know was, that by default mp3gain stores the information in the APEv2 tag which the Sansa Clip does not read. In order to be used by the Sansa Clip's Replay Gain function, it must be stored in the ID3v2 tag.

mp3gain has an option to do exactly that: -s i

I'm now using the following command to analyse and tag my MP3 files:

mp3gain -p -s i *

Where the option -p also preserves the original file date.


Donnerstag, 3. März 2011

Lift and AutoComplete

The Lift-Web-Framework allows you easy access to JQuery's AutoComplete widget. If you have used Google, you might agree that the drop down list which is populated with entries depending on your current input is a nice thing to have.

Here is how you integrate it into your Lift application.

First you have to add a dependency to your project (in this case Lift 2.2, using Scala 2.8.0):

If you use SBT in ./project/build/Project.scala

override def libraryDependencies = Set(
...
"net.liftweb" % "lift-widgets_2.8.0" % “2.2” % "compile->default",

In a Maven project this should translate to (in pom.xls - not tested, I'm using SBT):


<dependency>
<groupid>net.liftweb</groupid>
<artifactid>lift-widgets</artifactid>
<version>2.2-scala280</version>
</dependency>


The first step in your application is the initialisation, by adding the following code – usually into into Boot.scala

import _root_.net.liftweb.widgets.autocomplete._

class Boot {
def boot {

AutoComplete.init

In your template, the widget is represented like any other input field with a tag of your choice. This example uses

Here the snippet code to bind it:

Helpers.bind("dt", in,
...
"autocomplete" -> AutoComplete(startValue,
buildQuery _,
value => processResult(value)
),
...

where:
startValue is a string for the initial value of the AutoComplete text field.
buildQuery is a function to populate the drop down list.
processResult is a function called when the form is submitted, containing the value of the widget (or not, see bug report below).

Here is a simple example of processResult

def processResult(s : String) = {
println("%s".format(s))
}

The interesting part is the buildQuery function. It has the following signature:

def buildQuery(current: String, limit: Int): Seq[String] = {
...
}

where
current is the string typed into the autoComplete text field.
limit is an integer to limit the number of Strings returned by the function

A valid but not very useful implementation would be (from http://demo.liftweb.net/ajax)

def buildQuery(current: String, limit: Int): Seq[String] = {
(1 to limit).map(n => current+""+n)
}

Most application however will query a database. Lets assume that Mydatabase has a field called name (e.g. with the names of employees). A query might look like this:

def buildQuery(current: String, limit: Int): Seq[String] = {
Mydatabase.findAll(
Like(Mydatabase.name,(current + "%")),
OrderBy(Mydatabase.name,Ascending),
MaxRows(limit)
).map( _.name.is)
}

This will findAll names in Mydatabase which start with the currently entered string, sorts them, and limit the number of results.

That's all you need.

Bug or a feature?

The current implementation of the AutoComplete functionality (Lift 2.2) only allows the selection from a drop down list as a valid input. This sounds reasonable, but it also prevents you from clearing the input after you have made a selection. This can lead to the following situation:

At a shopping site, the user selects an article via an autocomplete field. Then he changes his mind and clears the input field using the delete key. When he clicks on the submit button the previous selected article is sent to the server, even if the screen shows an empty text field.

With the help of Sergey Andreev, I have developed a small patch which has also been published in Lift ticket 892. Even though it is only 8 lines long, it is unlikely to make it into Lift due to Intellectual Property policy consideration by DPP.

The patched version is available on GitHub.

If you copy it into your project, you might want to change the package name (first and last three lines) and replace

import _root_.net.liftweb.widgets.autocomplete._

with your package name.

Keep in mind that the returned result may contain strings (including an empty string) that might be invalid.

Mittwoch, 15. Dezember 2010

itrackutil 0.1.3 available

After a recent update in Ubuntu 10.10 and 10.04 itrackutil.py exits with the the error message “USBError: Resource Busy” before the user is able to download GPS data from the device.
This version fixes the problem.

Developer information:

A previously unrelated kernel module (cdc_acm) suddenly started to grab the USB device.  cdc_acm  which usually supports USB modems now creates the device /dev/ttyACM0 as soon as the GPS mouse is plugged in.

If you read /dev/ttyACM0 you get the real-time GPS data in NEMA format.  This is an unusual use case. The normal data connection is over Bluetooth.

However, the creation of this device file blocks all other USB access to the GPS mouse; in this case the direct USB communication which itrackutil.py uses to access the data stored within the unit's memory.

Fortunately there is an USB API call for this situation: detachKernelDriver.
This function does, what it says it does.  You have to call it after opening the device. Root privileges are not necessary.

The call will fail, if there is no kernel driver to detach. You have to catch this exceptions:

... determine device, interface, and configuration ...

try:
    handle = device.open()
    handle.detachKernelDriver(interface)
except usb.USBError, err:
    if str(err).find('could not detach kernel driver from interface') >= 0:
        pass
    else:
        raise usb.USBError,err       # any other USB error

handle.setConfiguration(configuration)


The companion API call attachKernelDriver is not available via PyUSB 0.1. But this is only a minor problem, because as soon as you unplug the unit and reconnect it, a new USB device file is created (with the kernel driver attached).

Samstag, 13. November 2010

WinTV-HVR-1900 under Ubuntu 10.04 and 10.10


A few weeks ago I bought a Hauppauge WinTV-HVR-1900 (USB id 2040:7300) which I wanted to use with a (32 bit) Ubuntu 10.04 and 10.10 system.
 
Quick installation summary:
  • Does it work out of the box: No
  • Does it work at all: Yes
  • If you are able to update to Ubuntu 10.10, do it.
This post only describes how to get the basic functionality working (i.e. display/record a signal on the composite video input).
 
The HVR 1900 is a small box which is connected via a USB2 port (USB1 is not supported for bandwidth reasons). There are inputs for composite video (e.g. VCR or set-top box) an antenna input and a S-VHS input. The device comes with a UK power supply (with a UK mains plug) and a bulky mains plug adapter for continental Europe.
 
In order to get the digitizer running, this device needs firmware.  Ubuntu comes with a selection of firmware images for various Hauppauge systems, but none was suitable for this device.
 
The firmware is included on the Windows driver disk you get with the device, but which files do you need?  Fortunately there is a perl script available that scans the CD and extracts the files you need based on a bunch of MD5 sums stored in that script.  Perl is installed by default on a Ubuntu system, so slide in the CD, open a terminal and enter
 
perl fwextract.pl /media/XXXXXXXXXX
 
(where XXXXX is the CD title)
 
In my case the following files were found:
  • v4l-cx2341x-enc.fw
  • v4l-cx25840.fw
  • v4l-pvrusb2-29xxx-01.fw
  • v4l-pvrusb2-73xxx-01.fw
 
For the next steps you need root privileges:
 
  • Change the ownership of those files to root (for security reasons)
    sudo chown root:root *fw 
  • Copy the extracted files to /lib/firmware
    sudo cp *fw /lib/firmware
 If you're running Ubuntu 10.10, that's all you have to do.
 
Keep an eye on the system log when you now plug the digitizer into the USB port.
tail -f /var/log/syslog
 
Among other messages, it should confirm that the firmware was uploaded successfully.
 
...
cx25840 5-0044: firmware: requesting v4l-cx25840.fw
cx25840 5-0044: loaded v4l-cx25840.fw firmware (16382 bytes)
...

 
Utilities for controlling the device from the command line can be found in the package ivtv-utils (from the Ubuntu repo).
 
v4l2-ctl --set-input 1
 switches to the composite video input
 
v4l2-ctl --set-ctrl=brightness=128,hue=0,contrast=68,volume=54000
 sets basic parameters for the digitizer.
 
Call v4l2-ctl without parameters for more help, and you will definitively want to try the switch -L
 
Recording is as simple as:
cp /dev/video0 video.mp2
 
This works most of the time.  Approx. 5% of the recordings contain a distorted audio stream. This distortion is present for the whole length of the recording and usually ends the next time the device /dev/video0 is opened. 
 
If the audio is ok at the beginning, it stays that way.  This looks like an initialization problem when the device is opened.  I haven't found a fix, yet.
 
Now to the more difficult part:

Getting the device to work under Ubuntu 10.04.
 
As mentioned before, many Hauppauge devices need firmware, which is uploaded to the unit when you plug it into the USB port.  Older hardware only needed 8192 bytes of firmware.  The firmware for this device however is 16382 bytes long (see the above firmware upload message from the log).  The device driver controlling the HVR-1900 (pvrusb2) that comes with kernel 2.6.32 and earlier is only capable of transferring 8192 bytes. And Ubuntu 4.10 LTS uses... 2.6.32.
 
Newer versions of the pvrusb2 driver can also upload the larger firmware.  For older kernels (like the one used in Ubuntu 4.10), you have to compile the updated driver yourself.
 
Compiling a kernel is usually a simple task, because the kernel source code already contains all dependencies. But this time, there were complications.
 
You need:
  •  the kernel source
  •  the tools to compile the kernel
  •  and the source of the updated driver
The easiest way to get the Ubuntu Linux source is by installing a package named "linux-source". It will store the source code as an archive in /usr/src/linux-source-2.6.32.tar.bz2 
 
You have to unpack it - make sure that you have plenty of disk space available:
 
cd /usr/src
tar xvfj linux-source-2.6.32.tar.bz2

 
Then run the following commands
 
cd linux-source-2.6.32
make oldconfig
make prepare
 

This will "regenerate" the .config file used by your distribution's kernel.  This file is needed during the kernel compilation.
 
Now we have to download the source code of the current pvrusb2 driver which can be found here. Unpack it and copy the content of the directory driver to /usr/src/linux-source-2.6.32/drivers/media/video/pvrusb2/ overriding the current files with the same name.
 
(Please note: the pvrusb2 documentation is describing a different approach, that did not work for me (modprobe rejected the module))
 
The next step would be:
 
make modules
 
But due to a totally unrelated bug  the compilation will fail, while trying to compile the "omnibook" files.
 
Download the patch for this bug from here and apply it
 
cd /usr/src
patch -p0 _name_of_the_path_file_

 
Now it's time to compile the modules:
 
cd /usr/src/linux-source-2.6.32
make modules

 
This step is very time consuming. If you have a multi core processor use the -j# option (where # is the number of cores you have).
 
Copy the new module from
/usr/src/linux-source-2.6.32/drivers/media/video/pvrusb2/pvrusb2.ko
to
/lib/modules/`uname -r`/kernel/drivers/media/video/pvrusb2/pvrusb2.ko
 
(where `uname -r` (backticks!) will be replaced by the name of your current kernel)
 
Keep in mind that you have to repeat that process after each kernel update.
 
After the next reboot the new module should be active. If you can't wait, unload the old one and load the new module manually:
 
rmmod pvrusb2
modprobe pvrusb2
 

Again, check /var/log/syslog for any problems.
 
Links:
  • http://www.isely.net/pvrusb2
  • http://www.isely.net/pipermail/pvrusb2/
  • https://help.ubuntu.com/community/Kernel/Compile
  • http://www.isely.net/downloads/fwextract.pl

Mittwoch, 20. Oktober 2010

ColorCube on a 64 bit machine


After a recent interview with Quentin Bolsee, the lead developer of the game ColorCube, I  downloaded the demo version of his game.  ColorCube is a simple nice puzzle game that can keep you occupied for hours.

But I had to find out that the program did not start on my main machine.

The command

ldd Launcher

quickly revealed that it a 32 bit application, and various libraries were missing on my 64 bit system.

The package ia32-libs which provide 32 libraries for 64 bit systems does understandably not contain all libraries that may be installed on a 32 bit system.  A simple work-around is to copy these files from a 32 bit set-up (/usr/lib) to the 64 bit system (/usr/lib32).

Don't forget to set the file owner to root on the target system., and keep in mind that those libraries will not be updated.

In order go get ColorCube running, I needed to copy the following libraries:

libHalf.so.6
libIlmImf.so.6
libIlmThread.so.6
libspeex.so.1
libtheora.so.0
libIex.so.6
libImath.so.6
libraw1394.so.11
libusb-1.0.so.0


Happy gaming...


Mittwoch, 11. August 2010

Lift + Scala, Installation + First contact

I have installed Lift and Scala on a Linux computer running the current Ubuntu version 10.04. Depending on your distribution, the commands may be different.

What you need is:
  • maven2 - a Java software project management and comprehension tool
  • jetty - a Java servlet engine
  • Java
Note that this is not the only possible configuration. There are other project management tools like SBT and other servlet engines, e.g. Tomcat. However, the documentation I've seen mostly describes maven and jetty.

Installation of Scala

Please note: The following step will install Scala. It also lets you run Scala commands interactively from the command line. This is a very good learning tool, especially for beginners.

This is a modified version of the instructions given by the London Scala User Group Dojo:

  • Warning: Do not use Scala from the Ubuntu (10.04) repositories. The repo contains an older 2.7 variant - we want 2.8!
  • Create a folder that will hold one or more versions of Scala:
    sudo mkdir /opt/scala
  • Change that folders ownership to your username:
    sudo chown -R username.username /opt/scala
  • From http://www.scala-lang.org/downloads download Scala final for Unix, Mac OS X, Cygwin. This is a gziped tar archive file.
  • Open the dowloaded file (Archive manager - file-roller) and extract to /opt/scala/
  • Create a sybolic link (future proof the install):
    ln -s /opt/scala/scala-2.8.0.final /opt/scala/current
  • Define environment variable SCALA_HOME by editing ~/.bashrc and adding the line:
    export SCALA_HOME=/opt/scala/current
  • Add the Scala executables to your path by editing ~/.bashrc and adding the line:
    export PATH=$PATH:$SCALA_HOME/bin
  • Open a new terminal or load the changes in your ~/.bashrc file using the command:
    source ~/.bashrc
  • Test scala is working using the following command:
    scala -version or scalac -version
    You should see the following as output:
    Scala code runner version 2.8.0.final -- Copyright 2002-2010, LAMP/EPFL
    Scala compiler version 2.8.0.final -- Copyright 2002-2010, LAMP/EPFL

The version of Scala used for compiling the web app is stored in the maven repos and is at the moment (Juli 2010) at version 2.8.0.RC7. It will be downloaded and executed during the build process.

Installation of Java

Ubuntu comes with OpenJDK as standard. You might want to download the official Java from Sun... I mean Oracle:
  • Enable the partner repositories in Synaptic (or uncomment them in /etc/apt/sources.list) and reload the indices:
    sudo apt-get update
  • Download Java
    sudo apt-get install sun-java6-jdk sun-java6-plugin
  • Switch to the Oracle version:
    sudo update-alternatives --config java
    sudo update-alternatives --config javac

Installation of maven2 and jetty

sudo apt-get install maven2 jetty


Your first lift application:

Go into an empty directory an issue the following maven2 command:

mvn archetype:generate \
-DarchetypeGroupId=net.liftweb \
-DarchetypeArtifactId=lift-archetype-blank \
-DarchetypeVersion=2.0-scala280-SNAPSHOT \
-DarchetypeRepository=http://scala-tools.org/repo-snapshots \
-DremoteRepositories=http://scala-tools.org/repo-snapshots \
-DgroupId=com.example  \
-DartifactId=lift.test \
-Dversion=0.1 \
-DscalaVersion=2.8.0.RC7 

An archetype is a project template. lift-archetype-blank is a simple example Lift application, which is downloaded from http://scala-tools.org/repo-snapshots. You can browse this repository at http://scala-tools.org/repo-snapshots/net/liftweb
If you use http://scala-tools.org/repo-releases instead you get older more stable builds. repo-snapshots contains the nightly builds.
  • The artifactId (lift.test) is the name of the top level directory for this project (your choice).
  • The groupId is mapped (Java style: com.example becomes com/example) to the ./src/main/scala directory (also your choice).
  • version refers to the version of YOUR software.
  • scalaVersion of Scala in the maven repo.
After the download the project tree looks like this


This might look scary at first. But there are only 10 files.
./pom.xml
./src/main/scala/bootstrap/liftweb/Boot.scala
./src/main/scala/com/example/snippet/HelloWorld.scala
./src/main/webapp/index.html
./src/main/webapp/templates-hidden/default.html

./src/main/webapp/WEB-INF/web.xml
./src/packageLinkDefs.properties
./src/test/scala/com/example/AppTest.scala
./src/test/scala/LiftConsole.scala
./src/test/scala/RunWebApp.scala 

I'm not sure yet about the last group. My guess is they are used for unit testing and packaging of the WAR files for later deployment.

As for the first group:
  • pom.xml:
    This is the maven configuration file.
    It contains (among others) the URL of the repositories and the dependencies which have to be resolved during the build process. You will rarely edit this file. However, if you need modules that are not within the “standard” scope (e.g. a connector to MySQL servers), you have to edit this file in order to get them drawn into your project.
  • Boot.scala (in ./src/main/scala/bootstrap/liftweb/):
    This file contains code that is run once when the application is started.
    It is used to set-up menus, database connections, etc. You will have to edit this Scala code frequently when you want to use and configure these features.
  • index.html (in ./src/main/webapp/):
    The default template
    This is the template that is evaluated when you access it via the application server without any special file name (e.g. http://localhost:8080/). You will most likely create other templates.
    This particular template refers back to
  • default.html (in ./src/main/webapp/templates-hidden/default.html).
    This is also a template, but one that you will rarely change. It defines the “frame” in which your application runs, i.e. header, footer, menu bar, the html HEAD section (page title, meta tags, CSS definitions, etc.).
    Not all of its content is static. This file may contain Lift tags, most commonly the ones for displaying the menu, to change the page title, and to display feedback to the user (error messages, notices, warnings).
    You may create and use more of these “frame” templates, but in most cases you only need one.
  • HelloWorld.scala (in ./src/main/scala/com/example/snippet/):
    a so called snippet.
    These files contain the Scala code which fills the in the templates (e.g. index.html). This is where most of your coding will happen. You will create more than one snippet file.
Some folders are currently empty:
model, view, comet (in ./src/main/scala/com/example/).

In the example code I have seen so far, Scala code that defines persistent data structures (e.g. for a database) is stored here.

Bringing your application to life

In order to start the application change into the top directory (lift.web) and type
mvn jetty:run

After maven has finished downloading all dependencies and building the application, you can access the web application in your browser via http://localhost:8080

Montag, 9. August 2010

Lift + Scala, Introduction

A recent show of Floss Weekly made me curious about Lift, a web framework using Scala.  

“Scala is a general purpose programming language designed to express common programming patterns in a concise, elegant, and type-safe way.” so they promise  on the Scala website.

The Lift project leader praises his product as “a concise language, frame work with security features, very performant...”

A first glance

Lift, like any framework that you haven't written yourself, will take some time getting familiar with, and Scala, well, it's just another computer language... or so I thought.

Lift

Perhaps the most important feature of Lift is its template system.  These templates are strictly XML based text files without any programming logic.  Tags within the template link to functions in your Scala code that generates some output.  This output (also XML) then replaces the tag.  After a few more processing steps the result is returned to the enquiring web browser, your page gets rendered, end of story.  Yes, there are lots of support features within the framework – like html form generation, database connectivity, page access control – but this is the basic principle of Lift.

Scala

The designers of Scala cherry-picked the best features and concepts from other programming languages, some object-oriented stuff but they also borrowed heavily from functional programming. Its mantra: “everything is an object” and “if it's worth saying, say it with a function”.

Scala's smart compiler can in most cases infer types of variables, so you don't have to declare it manually.  The language has lots of these simplyfications, dramatical reducing boiler plate code.  However, you have to be familiar with these in order to be able to revert the expression back to its more verbose form, otherwise you will scratch your head when you encounter the “Scala smiley”:

 ( _ + _ )

Some language constructs help you avoiding Null pointer dereferences, or to catch all possible cases in a matching construct.  And being a statically typed language  the Scala compiler will be very stubborn if your types don't match.

You can write very elegant code – even though I wouldn't call deeply nested function calls simple to read, at least not yet.

Treacherous simplicity

Letting the compiler infer types looks like a good idea.  On second sight, it also means that you need a good memory or at least a helpful IDE.

Simplifying
   val a: Int = 1

to
   val a = 1

is simple and easy to understand. (The literal 1 is an integer, i.e. “a” must be integer as well). But:

val a = function_i_wrote_ealier_and_dont_remember_the_return_type()
val b = another_cool_function_from_the_web_framework(User => go look)

does work just as well. And now you either know the types or you have to look it up.

The possibility to drop dots and brackets in some situation lets you further “simplify” things:
   a.+(b)

becomes a much more friendlier
   a + b
(+ is a valid function name in Scala).

But
   a :: b

does not mean
   a.::(b)

but
   b.::(a)


(“Operators” that end with “:” bind from right to left).

Another nice feature: When defining a class how often have you assigned the values from the constructor parameter list to class variables for later use? It's usually the first thing you do.  In Scala this is done automatically.  Why hasn't somebody invented this earlier? 

Documentation + support

There is documentation available for Lift and Scala on the web.  While perhaps not exactly light reading, they will get you started.

For Scala http://programming-scala.labs.oreilly.com/index.html from O'Reilly is a good start, and on the Scala website there is http://www.scala-lang.org/docu/files/ScalaByExample.pdf.  Both publications expect that you have done some programming before.

For Lift you should check out master.pdf from http://groups.google.com/group/the-lift-book/files. More information is available at the Lift Wiki and a subscription to the Lift newsgroup is also recommended.

Montag, 28. Juni 2010

Update with caution - Firefox 3.6.6

The recent update to Firefox 3.6.6 seems to cause more problems than usual.

Over here, a Mac was the first to update - and Firefox did not re-start.  Having discovered the safe-mode option recently, I used it on the Mac:

/Applications/Firefox.app/Contents/MacOS/firefox-bin -safe-mode

After disabling all add-ons, Firefox 3.6.6 did start normally.

On my Ubuntu machine, Firefox is still on version 3.6.3.   So I decided to test FF 3.6.6 before the Ubuntu updater pushes the update.  I downloaded the Linux version of 3.6.6 from Mozilla and installed it in a separate directory. 

Multiple versions of Firefox can coexist on the same machine, but only one can run at any given time.  I.e. you have to close ALL Firefox windows of one version before starting the other.

Strangely enough, the new version worked even with the add-ons that crashed Firefox on the Mac.  But there were other issues:
  • no graphics on Google Analytics
  • no address resolution of a web server on the LAN (worked on FF 3.6.3, might be a 64 bit issue - ping is ok)
I think, I'll skip this one.

If the new versions has already been installed...

If you hover your mouse over the appropriate download button on the Mozillas website, you see a link like this one (perhaps with different o/s and language settings) in the status bar:

http://download.mozilla.org/?product=firefox-3.6.6&os=osx&lang=de

You can copy the link, modify the version number to get the older Firefox version.

[Update, June 29th]
Firefox 3.6.6 (32 bit and 64 bit) from the Ubuntu repositories run without problems.